Ms. Cherry
Leave a message
Ms. Cherry
Leave a messageHow to Sew a Shank Button

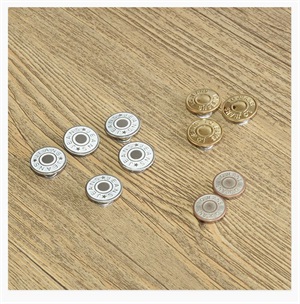
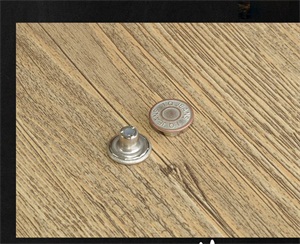
Today we share our knowledge about shank button. In near future,we will share the knowledge of jeans buttons,Snap Button,tuck button and Jeans Rivets .Many peaple know how to sew on a flat button, but not everyone knows the correct procedure for a shank button. There are two basic types of buttons, shank and flat types. The shank button has a raised back. This is a button that is sewn into the fabric. .The shank button has different sizes of handle depth, which is very different from the ordinary button.
When using shank buttons for heavy wool coats, look for deeper shanks instead of lightweight shirt buttons to sew the shank buttons more neatly and securely. In a heavy coat,the button will pull itself out of the hole because the short shank doesn't stay in place and it won`t be long enough to remain within the buttonhole. Different kinds of buttons ,for example,metal button,plastic snap button ,Printed Sewing Button and so on,they are sewn in different ways, so we need to pay special attention

Materials
Instructions
1. Threading the needle. Then, knotting the end of the thread.
2. On the garment, locate the exact spot you want to sew on your button. Starting on the garment`s backside, put the needle into the fabric and up through the garment towards you again.
3. Make two of these stitches with no button. Next, position your shank button over the stitches you just made on the garment interior. Anchor the inside button by making another stitch. The interior button is optional. However, if you think your shank button is going to be used a lot, an interior anchor button will protect the garment from wear and tear.
4. Take your needle up and make another stitch through the button and back through the fabric and interior button if you have one.
5. Pull the stitches up through the shank around seven times and secure the stitches by wrapping the thread around the stitches holding the shank button upright. Create a thread loop on one side and bring your needle through the loops. Pull everything tightly and securely. Make three blanket stitches around every thread holding your button. This keeps your button strong and secure. Make a knot and cut off the excess thread.
6. Use similar thread colors to the garment you are sewing on. Use quilting or carpet thread for thicker garments for extra strength. If you want a button to match the garment, take some from the shirttail and wrap your shank button with it.

Privacy statement: Your privacy is very important to Us. Our company promises not to disclose your personal information to any external company with out your explicit permission.

Fill in more information so that we can get in touch with you faster
Privacy statement: Your privacy is very important to Us. Our company promises not to disclose your personal information to any external company with out your explicit permission.